
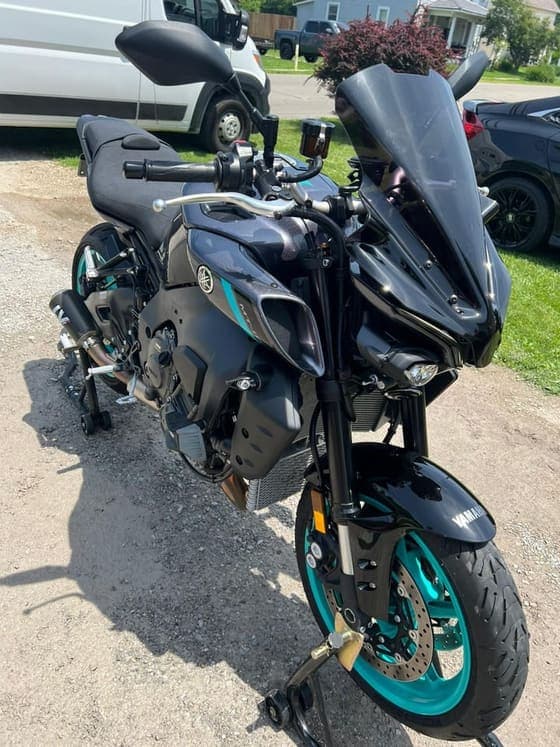
A motorcycle has exposed metal, painted bodywork, chrome, leather, and dozens of tight spaces a car never has, and it takes the full brunt of the elements with nothing but a fender to shield it. Good motorcycle detailing covers all of it: cleaning, polishing, and protecting every surface so road grime, brake dust, and UV rays do less damage over time.
This guide covers the full process: how to wash a bike correctly, chrome care, matte and custom-paint handling, storage and seasonal prep, and how motorcycle detailing differs from paint correction.
What Makes Motorcycle Detailing Different From a Car Wash
A car wash and a motorcycle detail are not the same job. A detail goes part by part, pulling dirt out of the spots that rust and corrode first, tight frame joints, spoke wheels, exhaust welds, and the gaps around fairings and tanks that a hose alone never reaches.
The core rule: work top to bottom, clean to dirty. That order keeps grime from running back down over surfaces you've already finished. Always cool the bike down first, never wash a hot engine or hot exhaust pipes, since rapid temperature change on hot metal can cause warping or, on chrome specifically, permanent staining. Wait at least 30 minutes after riding before any water touches the bike.
How to Wash a Motorcycle
- Cool the bike down. Park it and let the engine and pipes reach ambient temperature before any water touches them. Wait at least 30 minutes after riding.
- Move to shade. Direct sun dries soap into spots before you can rinse.
- Cover sensitive spots. Plug the exhaust tip and keep water off the air intake, key switch, fuse box, instrument cluster, and exposed electrical connectors.
- Pre-rinse at low pressure. Loosen dirt and dust before soap. A regular hose is safer than a pressure washer for most riders. If you do use a pressure washer, stay on the lowest setting with a wide fan tip, keep about 3 feet of distance, and never aim at bearings, seals, the chain, electronics, or the instrument cluster. Skip pressure on decals and emblems; it peels them right off.
- Degrease the lower end first, chain area, sprockets, and engine cases, so that grime doesn't get dragged onto clean paint later.
- Wash with a pH-neutral motorcycle or vehicle soap, not dish soap, which strips wax and protection, and not an aggressive cleaner that is too harsh on chrome and anodized parts. Use a soft mitt and the two-bucket method, top to bottom, rinsing in sections so soap does not dry in the sun.
- Clean wheels last, since they hold the most brake dust and tar.
- Dry thoroughly with clean microfiber towels. A leaf blower or dedicated dryer clears seams, bolts, switches, and spoke wheels better than a towel alone. Do not let the bike air-dry. An optional short, slow ride afterward helps fling out hidden water once the surface is dry.
- Re-lube the chain. Washing strips chain lubricant. A dry chain wears and rusts fast, so apply chain lube once the bike is dry, ideally to a slightly warm chain so it penetrates the links.
Engine wash (separate from the body wash): Keep the engine cool; never spray a hot engine, since thermal shock can crack parts. Use a degreaser and a detailing brush on fins and cases, then go light on water: wipe rather than flood, and use damp cloths near connectors. Cover or avoid the coil, plug caps, and wiring. Dry tight spots with a blower or compressed air. Most post-wash electrical issues come from water trapped in connectors, not from the engine itself.
Skipping the cool-down step is one of the most common ways riders damage their own bike during a routine wash. Hot chrome stains instantly when cold water hits it, and hot rotors can warp from the temperature shock.
Chrome Care and Protection
Chrome needs its own process, separate from the rest of the wash, since it scratches, pits, and tarnishes in ways painted surfaces don't. The plating is only microns thick and porous, so moisture can reach the steel underneath. Road salt, brake dust, and heat cycles (especially on exhaust pipes) open that path to rust. Abrasive pads and steel wool are off the table.
- Wash chrome gently with the same pH-neutral soap used on the rest of the bike, never a household detergent. Dry fully before polishing.
- Degrease exhaust pipes first when polishing chrome near the headers. Oil and road film on pipes will not come off with polish alone.
- Use a chrome-specific polish, applied with clean microfiber in small sections, to cut through oxidation and restore shine. Avoid aggressive all-metal pastes on plated chrome.
- Buff to a haze, then wipe clean with a separate, dry microfiber towel.
- Seal it. A chrome protectant or wax after polishing slows the next round of tarnish; reapply every 4 to 8 weeks. Spray metal protectant works for quick touch-ups between washes. Ceramic coating for metal is the longest-lasting option on show bikes. Near exhaust headers, use a heat-tolerant product, since standard wax burns off.
For light surface rust, crumpled aluminum foil dipped in water can lift spots without scratching the plating. Follow with polish and seal immediately. Deep pitting or bubbling chrome sits below the surface and usually needs a pro or re-plating.
Exhaust bluing (blue heat discoloration near the headers) responds to chrome polish when caught early. Once it bakes in deep, it stays.
The habit that matters most between polish sessions: dry chrome fully after every wet ride. Five minutes with a microfiber towel beats hours of rust removal later.
A reasonable chrome maintenance cadence: polish every 1 to 2 months during riding season (more often in wet or salty climates), reseal on the 4-to-8-week wax/sealant schedule above, and give chrome a complete clean, polish, and seal before extended storage.
Matte and Custom-Painted Motorcycles
Matte, satin, and custom-wrapped finishes need different products than standard glossy paint, and this is one of the most common mistakes in DIY motorcycle care. A standard polish or glossy wax formulated for regular paint will add sheen to a matte finish, permanently changing the look you paid for. Custom wraps can also react poorly to solvents and compounds that are perfectly safe on factory paint.
If your bike has a matte, satin, or wrapped finish, confirm with whoever's detailing it that they're using matte-safe or wrap-safe products specifically, not just the standard lineup. Ask before the work starts, not after. No wax, polish, or shine sprays on matte. Light straight wash motions and a pat dry only.
Storage and Seasonal Prep
A bike that sits unused for weeks or months needs real prep beforehand, not just a cover thrown over it.
Before storage:
- Wash and dry the bike completely, any residual grime or moisture left on the surface just sits there working on the finish while the bike is idle.
- Polish and seal the chrome, unsealed chrome left to sit picks up surface oxidation faster than you'd expect.
- Apply a protective sealant or wax to painted surfaces to guard against oxidation during the idle period.
- Store covered with a breathable cover (not plastic) and, ideally, indoors or out of direct sun.
Coming out of storage:
- Inspect for any new rust, corrosion, or chrome pitting that developed while the bike sat.
- Re-wash and re-polish to remove any storage-related dust or residue before the first ride.
- Check that seals and rubber components haven't dried out or cracked over the idle period.
Pre-storage prep takes a fraction of the time that spring restoration does if the bike went into storage dirty and unprotected. This is one of the few detailing steps where a little effort upfront genuinely saves real time later.
Motorcycle Detailing vs. Paint Correction
Detailing and paint correction solve different problems. A detail cleans, polishes, and protects a bike that's already in reasonably good shape. Paint correction addresses actual defects in the clear coat.
- Light scratches and swirls come out with paint correction during a standard detail visit.
- Deep scratches that reach primer or bare metal need touch-up paint or refinishing, not correction.
A detailer can tell you which category your bike falls into after a close inspection. If you're not sure whether your bike needs a routine detail or something more involved, that's a reasonable first question to ask when booking.
How Much Does Motorcycle Detailing Cost?
Price depends on bike size, chrome complexity, and condition. Typical ranges from our mobile service:
- Basic wash and dry: $50 to $90
- Standard detail (wash, polish, wax): $100 to $200
- Full detail with paint correction: $200 to $400
- Ceramic coating add-on: $300 to $700 depending on coverage
Touring bikes and customs sit toward the top of each range. Ask for a flat quote based on photos before you book.
How Often Should You Detail Your Motorcycle?
Frequency depends heavily on riding habits, storage conditions, and climate, similar to car detailing. For the full breakdown by scenario, see how often you should detail your car, most of the same climate and usage logic applies to bikes. As a general baseline: a full detail every 2 to 3 months for regular riders, with quick rinses after rain, salt exposure, or dusty rides in between, and always re-lube the chain after any wash.
Frequently Asked Questions
What's the difference between washing a motorcycle and detailing it?
Washing removes surface dirt with soap and water. Detailing goes further, chrome polishing, paint protection, tight-space cleaning in spots a regular wash misses, and correction of light surface defects. A wash keeps a bike clean between details; a detail is the deeper, periodic service.
Can I use regular car wash soap on my motorcycle?
It's not recommended. Dish soap strips protection, and some car wash soaps are more aggressive than motorcycle-specific pH-neutral formulas. That matters more on chrome and anodized parts, which are far more common and more exposed on a motorcycle than on a car.
Will a standard motorcycle polish ruin a matte or wrapped finish?
Yes, it can. Standard gloss-oriented polishes and waxes will add shine to a matte finish, changing its look permanently, and some solvents in standard products can react poorly with vinyl wraps. Always confirm matte-safe or wrap-safe products are being used on a non-factory-gloss finish.
Do I need to detail my motorcycle before putting it into storage?
Yes, if you want it to come out looking the way it went in. Unprotected chrome and paint left to sit for weeks or months pick up oxidation and grime that's far more work to correct in spring than it would have been to prevent with a pre-storage detail.
How much does motorcycle detailing cost?
A basic wash and dry typically runs $50 to $90, a standard detail $100 to $200, and a full detail with paint correction $200 to $400, depending on bike size and condition. Get a quote for an exact price based on your specific bike.
Can you pressure wash a motorcycle?
Yes, carefully: lowest setting, wide fan tip, about 3 feet back, and never aimed at bearings, seals, the chain, or electronics. For most riders, a regular low-pressure hose is safer and nearly as fast.
Ready for a Bike That Actually Shines?
Our mobile team brings the full detailing setup to your driveway or garage, so you never have to trailer your bike anywhere.
Motorcycle Detailing Near You
AtlantaBaltimoreBirminghamColumbusDallasDenverHuntsvilleIndianapolisJacksonvilleLos AngelesMemphisMinneapolisNew YorkNorfolkOrlandoSan AntonioSan JoseSavannahSeattleTampaTulsaWilmington